Thursday, April 28, 2011

French Onion Soup

I have probably mentioned before that I really don't eat soup. It's true. I hate it. I caved with miso soup and have been wanting to try french onion soup for a while. I love caramelized onions...to the point where I eat them out right out of the pan. My roommate makes fun of me for this. I figured french onion soup with give me a more dignified reason to do this...
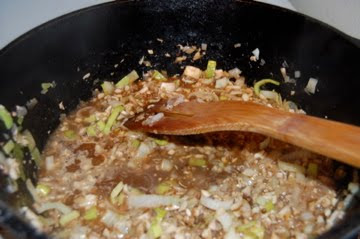
Check out that onion/broth goo! Yumity Yum Yum!
Almost ready for eating. To explain the onion behind the bowls, I grated a little fresh onion onto the soup before broiling the bread and cheese with it as suggested by Smitten Kitchen...I'm not sure it made a huge difference.
Cheese+bread+CARAMELIZED ONIONS=awesome food
I keep making a lot of brown things. It was good though, promise!

French Onion Soup
-3-4 white or yellow onions (1 1/2 lbs or so), shredded
-1 T butter
-drizzle of olive oil (to coat pan)
-spoonful of sugar (helps onions caramelize but you don't have to add it if you don't want)
-2 quarts beef stock (I didn't use this much. I also used some chicken stock and water to lighten it up)
-3 T flour
-1/8 C cooking sherry or red wine vinegar
-1/8 C cider vinegar
*You can use white wine instead but I didn't have any. I also really liked the tanginess that the vinegar brings...
-1/4-1/2 of a baguette, toasted and crumbled/broken into chunks
-1-2 C grated cheese (I used a combo of Swiss and Monterrey jack. I also am not really sure how much I used since I didn't serve all of the soup at once)

1. Heat a very large, deep pan (I used a big cast iron one), melt butter/oil. Shred onions (I use my food processor. It's awesome).
2. Cook onions, adding sugar if you want and more oil or butter as needed, over medium heat until very soft and caramelized.
*Note: Smitten Kitchen suggests that you "Add the onions, toss to coat them in oil and cover the pot. Reduce the heat to real low and let them slowly steep for 15 minutes"...I did this but am not sure how useful it really was.
3. When onions are caramelized, add flour and stir for a few minutes. Add wine and some stock, stir to combine.
4. Continue adding broth slowly, letting the onions absorb the liquid. Once most of it is added, bring to a simmer and cover slightly for about 30 minutes. Check and taste for consistency and add pepper if you want.
5. To finish everything off: Preheat broiler, top oven-safe bowls of soup w crumbled, toasted baguette, grate cheese and little raw onion on top, and broil until bubbly.

Tuesday, April 26, 2011

Spice Cupcakes with Lemon Curd


A week or so ago I had this extreme desire to bake something all day. Then I got into this productive mood and decided I wasn't allowed to bake anything until I'd gotten in lots of job hunting. Eventually, I was still "being productive" when my roommate (who actually works and stuff) came home and told me that another friend was coming over to make dinner.

Instead of just deciding to bake something tomorrow, I decided that I absolutely had to bake something right that second. I also decided that I didn't want to go to the store. This was slightly a problem. I wanted something fast, which meant cupcakes or brownies or something. As opposed to bread, for example, that needs to rise. I also didn't have milk, yogurt, or chocolate chips. Or much butter. I initially wanted to make ginger cookies. Not sure why since they're more of a wintery cookie but whatever. Alas, no molasses! I was discouraged. I don't like yellow cake much, vanilla cupcakes are boring, and chocolate cupcakes aren't as good if you aren't adding chocolate (alongside cocoa powder) into the batter (or so I thought. More on that later.). I felt like I was going to fail and I was not pleased about this. As a last resort I checked my cupcake cookbook (yes, ONLY cupcakes) for a spice cupcake recipe without molasses as a possible compromise. I WON! They exist and called for sour cream, which I had! Totally exciting. And quite delish when topped with lemon curd!

"Spiced Sour Cream Cupcakes"
Not really adapted from Fergal Connolly's 500 Cupcakes

*Note: apparently "the hearty flavor of these cupcakes [is] perfect for tailgating parties and fall picnics"...who knew!

-1 1/2 c flour
-1 tsp baking powder
-(2 tsp) cinnamon but I always do my spices to taste
-(1 tsp allspice), see above
-cloves, pumpkin pie spice, nutmeg, ginger: a sprinkle of each
-2 eggs
-3/4 C sour cream (I used lite and it still tasted delish)
-1 C brown sugar, packed
-3 T each golden raisins and chopped pecans if you like. I don't like either so I skipped that part.
*Note #2: The recipe says it makes 1 1/2 dozen but it barely made me 1 dozen...

1. Preheat over to 350. Line muffin tins.
2. Sift dry ingredients into a medium bowl, set aside.
3. Beat eggs and sour cream until combined, add sugar and mix well.
4. Add dry ingredients in batches until smooth.
5. Spoon batter into cups and bake about 20 min.

Top with lemon curd. I didn't make mine. You can, but I already had pre-made lemon curd on hand.
*Note #3: The recipe calls for a cream cheese frosting with orange juice and zest. It's probs lovely, but I didn't have cream cheese on hand...

Wednesday, April 20, 2011

Beef Stroganoff

I really don't eat enough meat. I love it but it gets a bit expensive and I just really don't think to buy it for some reason. Well, the other day I was feeling tired and lethargic and realized it's probably because I haven't had any red meat in a while. I decided to resolve that by cooking some meat. Brilliant plan. I wasn't sure what to make until I started chatting with one of the people I volunteer for. She immediately told me I had to make beef stroganoff. I can hardly remember the last time I had beef stroganoff and have certainly never made it. She told me how easy it was and I was hooked!

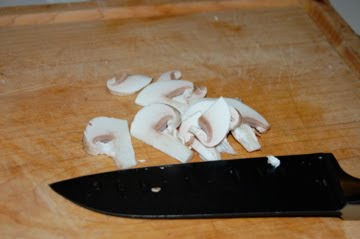
My biggest concern was the mushrooms. I can't stand the texture. The flavor is fine, it's just the texture that gets me. I resolved this by chopping them up super, super tiny. Like the size of minced onion.
Meat! Yum! I love that we finally have a knife that cuts it easily!
Brown the meat all over. A lot of recipes tell you to brown it in batches but I didn't bother. I just kept tossing it until everything was browned.
Onions and leeks and browned-meat-leftovers.
Cooking everything, pre-meat. Yum. Make sure to taste it as you go and keep adding spices and herbs.
MEAT! And below, the finished product! Unfortunately this may be one of the ugliest dishes to make and photograph...too bad they haven't figured out a way to make scratch-n-sniff pictures for the computer...

Beef Stroganoff (slightly adapted from Doran's Mom's version)
(makes about 3 good-sized servings)

-3/4 lb beef tenderloin (I got the cheapest I could find at Whole Foods and it was like $4!) trimmed of fat and chopped into 1-2 inch pieces
-3 or 4 little white mushrooms (or more, but I don't like them), very finely diced
-3/4 of a large white onion
-the white and light green parts of a leek, finely chopped
-olive oil
-salt n pepper
-nutmeg
-1/4 c sherry
-1/4 c Worcestershire sauce
-1/8 c red wine
-beef broth or water (I used beef broth)--as much or as little as you like depending on how soupy you want everything
-oregano
-1 tablespoons flour
-2 large spoonfuls of (low fat) sour cream or more or less to taste
-egg noodles

1. Cut steak and toss with flour, salt, pepper. Brown in oil or butter over medium heat. Once brown on all sides, remove from heat.
2. In the same pan: heat a little more oil if needed add the onions and leeks until soft and then add the mushrooms. Cook, scraping the bottom of the pan to get the browned bits of meat, until mushrooms are tender.
3. Meanwhile, set water on to boil and cook the egg noodles.
4. Add the sherry and Worcestershire to the onion/leek/mushroom mix, add herbs/spices to taste. Cook for a bit, continuing to scrape the bottom, and then add a little beef broth.
5. Bring to a boil, add meat and simmer until the meat is cooked. Add more beef broth as needed to keep enough liquid in the pan.
6. Once meat is done, turn off the heat and stir in sour cream.
7. Serve with noodles!

*Note: this reheats well!

Monday, April 18, 2011

Shortcuts

Who doesn't like shortcuts? I like all kinds...shortcuts when walking, driving, cooking, etc. However, since my sense of direction is dreadful, I don't really trust myself to take them. Luckily, cooking doesn't require a sense of direction so I can use those shortcuts.


The other night I was slightly hungry and going out to meet a friend at a bar and needed to leave fairly quickly. I could have made my favorite fast snack-toast-but I'm trying to eat other things besides bread. That got me thinking about things that I always like to have on hand so I don't have an excuse to make toast. Namely: pyrex (microwave steaming), frozen rice that cooks in minutes, meal starters (like noodles+sauce that you can add veggies to), soy vay, sweet chili sauce, canned tomatoes, and canned black beans. And a sharp knife.
The Indian and Asian meal starters are handy because you don't have to have all the spices or sauces that so often are used in those cuisines and only those cuisines (fish sauce, curry powder, rice vinegar, garam masala, etc). I actually happen to have almost all those things on hand, but sometimes I'm hungry and don't want to find all the spices and sauces, or I'm just feeling lazy. Or I want to make dinner with someone else and just bring over a nice little packet rather than several bottles and baggies. I did this the other night actually. I grabbed one of the Asian ones that comes with noodles and a sauce. We added garlic, broccoli, snow peas, and zucchini and made a totally easy, yummy meal.

The glass bowl and lid (with the broccoli on it) is my favorite pyrex. It's the perfect size to microwave veggies in! I add the veggies with a few tablespoons of water and microwave in 30-second intervals until they're bright green and still a little crunchy. It really beats steaming stuff in a steamer on the stove. Plus you can even drain the water out and then eat the veggies right out of the pyrex--only one dish to wash! Which is important if you don't have a dishwasher. Someday...someday...

Trader Joe's Frozen Rice is one of the most exciting finds I've come across. I hate making rice. I don't have a rice cooker and don't want one because my kitchen isn't really big enough. I don't like washing the rice and always get it stuck to the bottom of whatever pot I cook it in. And then I have to soak it forever to get the rice out. I don't know what my issue is. However, this frozen rice (brown or jasmine, are your options I think) is awesome and cooks in about 3-4 minutes in the microwave. So easy and it never burns!

Canned tomatoes (diced or not, I really don't care much) and canned beans. I usually have black beans because they go nicely with rice and onions and garlic which we always have on hand. You can make burritos or rice bowls without much effort. Canned tomatoes are always handy. You can use them for salsa, burritos, tomato sauce for pasta, eggs in hell, etc. Nice to keep these around.

Sweet Chili Sauce. My favorite sauce. I'm addicted. I'll even eat it on crackers... You can put it on rice and veggies (or just veggies which is what I ended up having the night that all of these shortcuts came to mind), you can dip spring rolls into it, it would probably be great on crackers with cream cheese. Really, put it on everything. I bet it would be a great dipping sauce for seafood or pork too.

Soy Vay. I grew up with this stuff and thought everyone did too. Apparently this is not the case. Poor kids, they've missed out! This, like chili sauce, is awesome on rice and veggies. It's a fab marinade for any meat, and I always put it in burgers.

Sharp knives are amazing. This one, sadly for me, is my roommates. It's glorious and actually cuts things without any effort! I can't wait to cut meat with it.

Monday, April 11, 2011

April: Bread


Thanks again Mark Bittman! You make my life awesome because I can make super good bread for a quarter (if that) of the price I'd normally pay!

Jim Lahey's No-Work Bread
from Mark Bittman's How to Cook Everything

-
4 C flour
-1/2 teaspoon yeast
-2 teaspoons salt
-2 C lukewarm water
-olive oil

1. Combine flour, salt, and yeast in a big bowl. Add water and stir until blended. Dough will be sticky and shaggy.
2. Cover with plastic wrap and let rise overnight and then some (about 18 hours). The surface will be dotted with bubbles.
3. Lightly flour a counter or table, turn the bread onto it and fold it a couple of times until it's smooth and soft. Add it into another deep bowl that's been lightly greased with the olive oil.
4. Let rise for at least 2 hours (I usually allow at least 4 because my house is cold) until the dough has more than doubled in size and doesn't spring back once poked.
5. At least half an hour before the dough is ready, preheat the oven to 450. Put a 3-4 quart oven-proof pot with an oven-proof lid (I use a cast iron dutch oven) in the oven and let it heat up.
6. When the dough is ready, dump it into the pot and cover it. Bake for 30 min with the lid on and then 20 min longer without the lid. Let cool before slicing (or at least try to. I never can)

April: Brownie Cupcakes

I seem to have a lot of friends born at the end of March and the beginning of April. Luckily the two birthday girls who through parties both wanted chocolate cupcakes or brownies. I compromised and used one recipe for both.

These are basically brownies in cupcake form so you get the brownie edges in each portion. They're delicious with slightly sweetened whipped cream of whipped cream-buttercream frosting.

Brownie Cupcakes
Slightly Adapted from Fergal Connolly's 500 Cupcakes

-9 oz semi sweet choc chips
-1/2 C butter
-1/4 C unsweetened cocoa powder
-2 oz unsweetened choc
-2 eggs
-1 1/2 C superfine sugar (or regular sugar sifted once)
-1 teaspoon vanilla
-1 C flour

1. Preheat the oven to 325. Line cupcake tins with liners.
2. Melt chocolate chips and unsweetened chocolate and butter in a double boiler until melted. once melted, set aside to cool.
3. In a medium bowl, beat eggs, sugar, and vanilla until pale and thick.
4. Fold in chocolate, cocoa powder, and flour until well combined.
5. Bake for 20-25 minutes or until a toothpick comes out mostly clean.

Whipped cream:
-1 C heavy cream
-1 tsp vanilla
-3 T powdered sugar, or more to taste

1. Beat cream until thick enough to spread but not butter, beat in sugar and vanilla.

Whipped Cream Buttercream
(I made this up!)
-1 C whipping cream, whipped until almost soft peaks
-1 tsp vanilla
-1/3 C butter (or half a stick), softened
-2 T milk or more as needed
-2-3 C powdered sugar, or more to taste

1. Whip the cream and set aside
2. Make the buttercream: beat butter and about 1/2 C powdered sugar to combine, add in milk as needed, keep adding in sugar a little at a time until you reach a smooth consistency and it doesn't taste like butter anymore.
3. Add in the whipped cream and mix until well combined. The frosting should be thinner than regular butter cream but smoother and heavier than whipped cream.
*Note: the frosting doesn't really harden ever

March: Quinoa


My mom really likes being healthy but she doesn't love to cook the way I do. While I was home and we were discussing healthy food, she mentioned that she had quinoa but hadn't really cooked with it. I haven't cooked with it before either so she gave me some to take home to see what I could come up with.

Thanks to my favorite (and yes, only) little brother, I own Mark Bittman's How to Cook Everything. Naturally quinoa was in there, because everything is, so I found a recipe for quinoa with roasted corn. I added a few other things, used more chicken stock, and succeeded in general. That being said, quinoa really isn't my favorite dish--it's the texture more than anything I think. However, here's my recipe. It, like so many dishes, I've noticed, tastes lovely with cheese and a fried egg like in the picture.

Quinua with corn, kale, and caramelized onions, adapted from Mark Bittman's How to Cook Everything

-1 1/2 C corn kernels (I used frozen so defrost them)
-3/4 C quinoa, rinsed and drained (I still for the life of me can't figure out how to wash and drain quinoa--it's too small for my strainers and rips the paper towels...so it probably wasn't really washed but still tasted fine)
-1-2 C chicken stock
-1 1/2 white onions, thinly sliced
-1/2 bunch kale, washed, dried, chopped
-olive oil
-salt n pepper to taste

1. Heat the oil in a large pan, add the onions and a pinch of sugar if you like
2. Cook until starting to caramelize and push to the sides of the pan
3. Add quinoa and add a little of the stock once the grains start popping and toasting (a few minutes)
4. Add the kale and corn, cook until almost tender
5. Add the rest of the stock and bring to a boil, stir, cover, and reduce heat to low
6. Cook about 15 without stirring and then test for done-ness
7. Add more stock as needed if it's evaporated (you want there to be enough liquid to cover the bottom of the pan)
8. Cook until quinoa is soft but has a slight bite to it and the veggies are cooked. Season with salt and pepper to taste. Top with cheese and a fried egg if you like. Also tomatoes are a nice addition.

March: Healthy Yam/Sweet Potato Lunch


When I was home in February, my mom and I were chatting about healthy lunch options that were more interesting than just a sandwich. I love sandwiches and all, but sometimes it's nice to have other options. I've done baked potatoes before--you can microwave them and bring various toppings. It's a fabulous winter lunch.

She mentioned sweet potatoes and how she likes to steam them and eat them with yogurt for a nice, healthy, light lunch. I got some as soon as I got home and made them a little fancier with other toppings:

-1/2 1 large sweet potato or yam, peeled and chopped
-balsamic vinegar
-1/3-1/2 C low fat cottage cheese

1. Steam sweet potatoes in a microwave safe container with a little bit of water.
2. Preheat the broiler while potatoes steam
3. In an oven-proof container, add sweet potatoes, top with a drizzle of balsamic and the cottage cheese
4. Broil until cottage cheese is warm

*Optional Add-Ins:
-goat cheese crumbled along with the cottage cheese
-spoonful of brown sugar on top to caramelize a little
-omit the balsamic and add a few spoonfuls of applesauce

March: Banana Overload

There's a place near Reed called Limbo where you can by dollar bags of fruits and veggies that are about to go bad. I learned about this just recently when a friend of mine called me up and asked if I had plans that night. I didn't. She said she had about 20 bananas that were about to go bad and asked if I wanted to help her deal with them. Of course I did!

We ended up with:
Banana Daqueris (I've made these before)
Jacked-Up Banana Bread/Cake courtesy of Shutterbean
Banana Blueberry Muffins (I've made these before too but skipped the whole wheat flour and added more butter and less applesauce)

Banana Cake-Bread Awesomeness barely adapted from Shutterbean

-4-6 ripe bananas
-3/4 cup sugar
-2 tablespoons salted butter
-1 large egg, plus 1 egg white
-1 teaspoon vanilla extract
-1 cup flour
-1 teaspoon baking powder
-2-3 teaspoons cinnamon (I always do spices to taste because I get too lazy to measure, so a few shakes of a cinnamon jar should do it)
-1 teaspoon nutmeg (1 shake/pinch)
-1-2 teaspoons ginger (slightly more than the nutmeg)
-1/4 teaspoon salt
-1/2 cup vegetable oil

1. Preheat oven to 325. Move rack to the center. Grease a 9 inch loaf pan.

2. Slice bananas in half lengthwise and cut in half through the middle. Trim to fill the bottom of the loaf pan.

3. In a large pan, bring 1/4 cup sugar and 2 tablespoons of water to a boil, without stirring. You can swirl the pan though. *Note: I doubled this because I love caramel. Cook until the water has evaporated and the mixture starts caramelizing. Remove from the heat and add the butter and whisk until melted.

4. Add the long banana pieces cut side down and cook over low heat for 1 minute. Transfer the slices cut side down to the prepared loaf pan, arranging them crosswise. Drizzle the remaining caramel on top. This is where more is good.

5. In a food processor, puree the rest of the bananas to equal 1 cup (add more banana if necessary--I did). Transfer to a bowl and all the remaining 1/2 cup sugar. Beat in the egg and the egg white as well as the vanilla.

6. In a large bowl, whisk the flour, baking powder, spices, and salt. Add the banana mixture and oil and stir until well combined. Pour the batter over the bananas in the pan and bake until a toothpick inserted comes out dry, 50 to 55 minutes. Try to let cool for 10 minutes, and carefully invert the cake onto a platter. I couldn't wait to let it cool completely so I ate it while it was still hot. I recommend this way. It keeps in the fridge, covered, for a few days...if you can resist eating it for that long. I couldn't. It's also good chilled

February Cont'd: Using Up Stock: Spring Risotto

I used up all of the chicken from my roast chicken in the pot pies but I still had chicken stock (I actually haven't even used it all up yet!) and wanted to use more before I froze it. A friend of mine makes possibly the best risotto I've ever had and she doesn't even use a recipe. I'm not jealous at all...really. This risotto turned out pretty darn great but I definitely checked recipes online first to get a sense of proportion.

Risotto

-4 C or so chicken stock or water or veggie stock. In this case I did chicken stock
-1 C arborio rice
-1/2 C or so white wine (optional)
-1/2 bag of frozen peas (the leftover peas from my chicken pot pies...)
-1/2-3/4 white onion, finely chopped
-1 zucchini chopped into 1-inch pieces or so and steamed briefly until almost crisp-tender
-2 cloves garlic, minced
-grated cheese (I used parm and a 3-cheese blend) to taste

1. Heat oil over medium heat and add onions. Cook until softened and add garlic, cook until fragrant.
2. Add the rice and toast until mostly translucent
3. Add wine if using, or about 1/2 C stock or water and cook until absorbed
4. Add the rest of the stock in 1-2 C intervals, waiting until absorbed to add more.
5. Once you've used about 3/4 of the stock, taste for done-ness and add other veggies
6. Cook until rice is soft and creamy and peas are cooked, season as needed
7. Top with cheese and butter if desired
*Note: a barely-fried egg on risotto just might be my favorite thing ever...try it if you haven't already!

February Cont'd: Using Up Stock: Baby Chicken Pot Pies

So I made that roast chicken and it was delish. But I can only eat so much chicken...I put it in sandwiches and on salads but still had extra. I also had a ton of stock and I need to do something with it or freeze it.

Plan #1:
Chicken Pot Pie--uses chicken+stock. Win.

I love chicken pot pie. I always have. Really I love anything with a crust and gravy and this fits the bill perfectly. I'd seen a recipe for baby chicken pot hand pies or little chicken empanada things and figured that might be a good bet since a whole chicken pot pie to myself sounded pretty intense. I'm very glad I went this route because I froze half of the recipe unbaked and it worked beautifully.

Chicken Hand Pies
slightly adapted from sophisitmom

chicken hand pies or chicken pasties

-1 medium potato, peeled and diced
-1 tablespoon olive oil
-1 small onion, finely diced

-2 cloves garlic, minced
-1/2 a bag of frozen peas
-1 carrot, chopped (more if you like them)
1 tablespoon butter
1 tablespoon unbleached all-purpose flour
-2 cups chicken stock (her recipe calls for a bit less)
salt and pepper to taste
-1 1/2-2 cups cooked chicken, shredded
pastry dough (recipe follows)
1 egg, plus a teaspoon of water, beaten

1. Place potatoes in a medium saucepan, cover with water. Bring to a boil and cook until potatoes are tender. Drain and set aside.

2. Meanwhile heat a large pan over med-low heat and add in the olive oil, onion, garlic and carrot. Cook until onions are very tender, about 12-15 minutes.

3. Melt butter into the mixture and stir in flour. Let cook for 2 minutes or so, just to let the flour taste cook out. Pour in about half the chicken stock.

4. Add the peas and potatoes. Let simmer a few minutes and taste for flavor. Add salt and pepper if needed.

5. Add in chicken and simmer until heated through. The mixture should be thick, but not too dry. Add more chicken stock until you achieve the desired consistency (I used the 2 cups and maybe a little more).

6. Chill mixture--it's easier to fill the pies--while you make the crust.

pastry dough

-2 1/4 cups unbleached all-purpose flour
-1 1/2 teaspoons salt
-1 teaspoon sugar (optional)
-1 stick (112g) cold unsalted butter, cut into 1/2-inch cubes
-1 egg, slightly beaten
-1/3 cup ice water

1. In a food processor fitted with the blade attachment, pulse together the flour, salt, and sugar. Add in the butter, and pulse a few times until the mixture is crumbly. Combine the egg and water in a container (remove all ice pieces). While the processor is running, pour the water/egg mixture in and pulse until mixture just comes together.

2. Pour mixture out onto a floured board and knead a few times to bring all the ingredients together. At this point I like to return it to the fridge or freezer before rolling it to make the butter a little colder.

3. Spray a baking sheet with Pam or some kind of spray-oil. Roll out the pastry dough on a floured board into a big rectangle. Cut in half, and then cut each half in thirds, to make 6 equal smaller rectangles.

4. With a large spoon, spoon a big scoop of the chicken mixture onto one of the rectangles of dough, placing it slightly off center. Fold the dough, encasing the chicken in a little pouch, and seal the edges with a fork. Place on the prepared baking sheet. Stab the top twice with a sharp knife, and brush with the beaten egg and water. Repeat. Refrigerate for at least 30 minutes.

3. Preheat oven to 425 degrees while pasties chill

5. Bake for 15-20 minutes, or until the pastry is golden brown and puffed.

*Note: I only had half the dough I needed for the amount of filling I had. I used up the dough and then when I made my second batch, I froze them before baking them. When cooking them from frozen, expect to bake them a bit longer. They taste possibly better because the crust gets super flaky.